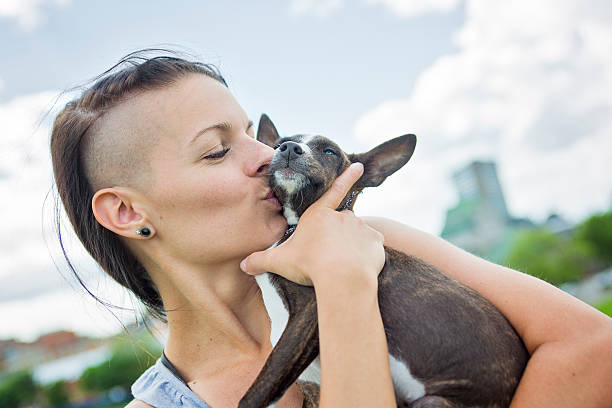
Portrait photography is not only possible indoors. Outdoor portrait photography can be just as rewarding for both the subject and the photographer. A photo can be made more compelling by the scenery surrounding your subject. The scenery can be more to your subject than just a background in a studio. This article will explore outdoor portrait photography and offer tips on how to take better portraits outdoors.
Outdoor Portraiture: How to Choose the Right Gear
Camera gear should be more emphasized. While your equipment is essential, it won’t make or break your photos. Technique, sense, composition, awareness, light, planning, and color sense are more important than the gear.
Your choice of equipment can still make a big difference in outdoor portraiture. I will go over some of these considerations. I will concentrate on the things that make a difference in this type of photography .
- Focal Length
Your focal length is always a compromise between practical and creative choices. It is easy to capture outdoor portraits. A wide-angle lens, like a 14-24mm can be an excellent choice for dramatic elements such as the sky, mountains, or buildings. Telephotos such as 70-200mm are great for removing specific background details while still capturing the “feel” and atmosphere of the surrounding environment. A 50mm lens is a good in-between.
A variety of lenses is a good idea for outdoor portraiture. Outdoor portraiture is very different from studio-based photography, where you can use a single lens, like a 35mm for full-body and an 85mm for headshots. However, outdoor photography requires that you pay attention to the surrounding environment.
Consider your photo goals and your plans for the environment. A long lens and a large aperture are best if you want your environment to look natural. A wider lens is better if you are looking for an “environmental portrait”, which emphasizes the essential elements of the scene.
- Wide vs. Narrow Apertures
Wide aperture lenses, such as F/1.4 and F/1.8, offer great flexibility regarding the mood of your portraits. They allow you to use a shallower depth-of-field when you need it.
It doesn’t mean you will always use the f/1.4 aperture or f/1.8 aperture. The environment of someone can tell us a lot about them or their life. A blurry background can be distracting from the message or hindering storytelling. There may be better looks for your photo.
Flexibility is the key. You can use a lens with a large aperture to get the “beautiful-bokeh” look. This is also true for outdoor environments. You can always lower the gap to capture more of the surrounding environment.
- Eye Autofocus
This is a handy tool! The camera automatically focuses on the subject’s eyes, allowing you to focus on other aspects of creating a photograph. Although skilled photographers can take great portraits with no autofocus, this feature is still handy.
Many DSLRs and mirrorless cameras have an eye autofocus function. If you are looking for a camera to take outdoor portraits (or any other type of portrait photography), ensure it has this feature.
- Weather sealing
You can be in danger by shooting outdoors in rainy areas, deserts, and salt spray. These shouldn’t be reasons to abandon your camera. The pouring rain captured some of my favorite photos of couples.
Therefore, I highly recommend well-built and weather-sealed gear. Armor is essential for any soldier who goes out on the field without it. An umbrella is a good idea as well. It’s important not to let the weather stop you from taking great photos.
- Lighting Equipment
You might think I have forgotten to mention the importance of lighting. I will emphasize this importance in order not to offend anyone. It’s such an important topic, that it warrants a whole section. I’ve also written in detail about lighting options later in this article.
Selecting a location
It is time for portrait photographers and landscape photographers to be like them! Outdoor portrait photographers, just like their tripod-based landscape-loving buddies, succeed or fail largely due to the scenes they find. These are my top tips for making sure your portrait subject is in harmony with the surrounding environment.
- Scouting
A portrait shoot is easier if you are familiar with the setting. This involves visiting the location beforehand to plan compositions and to observe the sun’s path throughout the day. You’ll be able to identify the best shots and avoid any mistakes by the time the shoot day arrives.
It’s also important to be open to inspiration at the moment. You should remember that things may happen that are not in your plan.
- Locating Open Locations
Outdoor portraits are best taken in open spaces, such as meadows or rooftops. Because there are few background elements, these areas can provide good subject isolation and negative space. They allow for both the subject and photographer to move easily. These settings can create a lighthearted, minimalistic, and uncluttered feeling.
It’s not difficult to find these places, but I recommend searching for open spaces near other types of environments, such as a field next to a forest or a rooftop parking area close by a street with neon signs. Although the open-air look is classic and great, you might want to give your client more variety in the photos you send.
- Locating Enclosed Locations
Closed spaces like alleyways and dense forests can create a feeling of confinement. These places provide context and positive space that can be used as a backdrop for portraits. For example, a large public mural, huge boulders or texture tree trunks can be used. These locations can convey a story or create an atmosphere that is not possible in open spaces.
You should ensure that any enclosed area you choose is safe and easily accessible. It’s not a good idea to have your subject traverse difficult terrain during a pregnancy photoshoot.
- The Mood for Structures
Many manmade structures, such as churches, bridges, and barns, have a particular vibe. Yes, that’s their exteriors! This fits the idea of this article!
The patterns and symmetries of buildings can be used to frame your subject or draw the eye in a photograph. You can also use building exteriors to improve the quality of light. Brighter buildings, for example, can be used as reflectors to bring in more light onto your subject. The light that falls upon your subjects can also be shaped by windows, bright paint, and shadowy areas.
This is a great reminder of how important light is for outdoor portrait photography. That will be my next topic.
Lighting Basics
Portrait photography is a very important art form. If you aren’t paying attention to light, whether artificial or natural, people’s faces can end up with unwelcome shadows and dull illumination. These are the top considerations.
- Sunset and Sunrise
Sunrises and sunsets are two of the most popular times to shoot outdoor portraits. The sun will rise low so the lighting is more even, warmer and softer. This kind of light makes it easier to be a photographer.
The golden hour light is fleeting so it can be difficult to coordinate all aspects of the shoot. You should plan ahead to ensure you have enough time to set up and get in position.
For sunrise, set realistic goals. Before you go, make sure to have flashlights, safe transportation and a place in mind. Most people have difficulty getting up in the morning, so make sure that your subject is aware of what they are doing. If you don’t know what your subject is doing, you might be setting them up for grumpy or sleepy expressions.
Although sunset is a better way to make use of this type of lighting, both can produce great results. I don’t usually choose one over the other due to differences in lighting (even though they can be different), but based on the best option for my subject.
- Backlit Conditions
Backlit photos are a great way to capture artistic backgrounds without using harsh light. Backlighting has the added benefit of not exposing the subject’s face to direct sunlight. Although it is possible to get great photos without direct sunlight shining on the subject’s face it can often lead to harsh shadows or intense specular highlights.
Backlit portraits are easy to capture. First, align your subject so that the sun is in front of you. The sun should be left out of the frame. Otherwise, it can draw too much attention to the image. You can attach or leave your lens hood off depending on how much flare and color you desire. Next, make sure to expose your subject’s face. You may need to compensate for negative exposure. You can now take backlit portraits.
- Shade: Making the Most of It
Another way to avoid the harsh sun is to place your subject in shade. It doesn’t have to be about taking photos on cloudy days, but it can also mean finding one shade spot on a sunny day. You should look for fences, trees, awnings and the walls of buildings.
Pay attention to their direction even if they are in the shade. Their face might look more sculpted and interesting if they are standing in the shade, but looking toward the sun. Play around with the position of your subject and observe how the light changes when you move (even if you are in the shade).
- Reflectors
The best reflectors are lightweight and inexpensive. They alter the scene’s natural light. You can use them to reflect light onto your subject. They are often used to fill shadows in outdoor portraits, but can also be used as the main (or primary) lighting source.
You can place your subject in shade or near direct sunlight and bounce the direct light at them. This will ensure that the scene is evenly lit except for the light from the reflector which you can manipulate as much as you wish.
Although a reflector can be used to offset direct sunlight that has fallen onto your subject, this is more difficult. Most of the time, I recommend that you move your subject to the shade.
You can overdo it and have harsh contrast with reflected light. You may have to switch to a white reflector that is diffuser, and not a shiny, silver, or gold one.
A reflector requires something or someone to hold it. This is another concern. My tripod has been used in emergency situations, but it can be frustrating as reflectors are great at catching wind. It is easier if you have someone to help you.
If used correctly, the reflector can be used to enhance outdoor portraits and really make your subject pop. For most of these photos, I used a reflector. I would not be without it for outdoor portrait photography.
- Bokeh Balls
The “Bokeh balls”, which are tiny and isolated, occur when light sources that are out of focus in your photo. Although they are not very popular, they are highly sought-after by clients and provide a beautiful aesthetic in portraiture. If you are outdoors, out-of-focus leaves from trees can be used to capture bokeh balls. String lights work well in urban settings.
Props
Props are a great way to tell a story and compliment the scene. They can also make your subject feel at ease. You can use this with many things, including flowers, books, candles, tools, cars, rings and hats as well as balloons, balloons and railings.
A maternity shoot might include balloons that mimic the shape and feel of a pregnant woman’s belly. Posing can be awkward for some people so it is helpful to have something familiar that they can use with their bodies.
Be aware of your mood
Every detail, including the colors and expressions of your subject, can affect the mood of your photograph.
For example, forests in winter can create a feeling of dreadful cold or stark darkness. An engagement portrait session might not be a good idea in a dark wooded setting. Perhaps the setting is filled with brambles and fog, but the couple is lit by a lantern. This will indicate inter-personal warmth, security, and security.
You shouldn’t pick a place just because it looks cool. Instead, think about the message it conveys. Consider how your subject would feel in the setting. Some people can take bad weather and still get great photos. If you don’t finish, others might look at you like you are going to die.
One final tip: Terrain, Weather, and Hazards
Also, think about the wildlife. Is there wildlife in the area, such as bees or snakes? How far is it from the site? Are they able to travel that distance? You will need to have drinking water, warm clothes, and hiking boots depending on where you are going.
Although these suggestions might seem obvious or simple, outdoor portrait photography can be as challenging as a backpacking trip. These things are important to consider before you leave. Your photos and subject may be miserable.
Keep these things in mind and you’ll have great outdoor portrait photos. Outdoor portrait photography is more challenging than usual. You have to combine the challenges of landscape and portrait photography. But the results are well worth the effort. Photographs of outdoor portraits tell stories with ease. These are the challenges that you must overcome to improve your photos.